Abstract Illustration

For this exercise I chose Miles Davis as the artist whose music I would listen to whilst I drew. I chose the song ‘So What’ – I didn’t listen to it before I started the exercise as I didn’t want to be anticipating certain parts and/or think about how I would represent the sounds through mark making – I wanted the illustration to be as spontaneous as possible. I’m glad that I did this because the song itself felt spontaneous and experimental.

So What – Miles Davis – Youtube

I gathered multiple materials before I began, using inks, crayons and pens. I also used water to smudge the pens and blend all the materials together.

2020-04-11_150226

I worked on A4 watercolour paper. I do think this exercise would have been particularly effective working on a larger scale and allowing the body to move more with the music but due to the circumstances right now I am just trying to work with what I already have. I did still manage to work loosely and freely on a smaller scale. I moved with the music and changed materials when it felt right in the song. I followed the sounds moving up and down for the higher and lower notes and worked with ink and water, splashing and smudging on the paper in the smoother parts of the song. Above is the scan of the finished piece – I do think it is interesting how a lot of it looks almost like sound waves, it was not intentional and even though it is a very abstract image it does manage to illustrate the song in a way.

After scanning in the drawing I moved it into procreate where I played with the crop tool to frame different sections of the drawing to see what I felt worked best for a cover for the song. I decided on this crop because I think that it captures a little bit of all the elements of the piece – the different textures of the crayon, pen and inks.

After deciding on which area of the drawing I was going to use I did play around a little and experiment with the hue/saturation tool. I wanted to play with the colours and see if anything fit the song better than the original colours I selected. I did like these blue/green ones but they definitely felt much calmer than the actual song did. The pinks/reds I used in the original illustration were much more true to the song in that they held the same intensity as the music. There was definitely something going on with this in my subconscious whilst I worked as when I was working I was just grabbing whatever ‘felt right’, but when I think about colour theory and the emotions that colour can represent there is a definite connection. Red represents intense emotions/energy and pink is a shade of red – I don’t want to put too much on this as it is just speculation but I did think it was interesting. I have never worked like this before and I certainly enjoyed the freedom!

Next I moved on to choosing the fonts for the illustration. I always spend far too much time on choosing fonts but i do think it is so important to the overall image, different fonts can give the whole drawing a completely different feeling – and the wrong font can distract from even the best illustrations.
For this I wanted to select a font that was quite clean as I wanted it to contrast with the busy background of the illustration. If I had chosen a font that was just as crazy as the illustration I think it would have been lost in the background.
To create the correct contrast whilst still having the text ‘fit in’ with the background for the name of the song I decided to have the text just as the outlines, I think this was an effective way of keeping the text bold and readable whilst still incorporating the background into it – even though I wanted the contrast I didn’t want it to feel unrelated. I kept the artists name full block letters so that it would stand out despite being smaller. I placed the text where it is and the size it is so again, it would feel like a part of the image – this is the same reason I kept the text black – there is black in the drawing but not enough to make the text unreadable.

img_2370

Overall I am happy with the way the illustration turned out however if I were to do it again I would like to work on a much larger scale and allow myself to be even more experimental with materials. It is hard for me to critique the drawing as with it being abstract it doesn’t fit into the usual categories I would be self critical about. I did enjoy the exercise as it did feel a little bit like letting loose and allowing myself freedom.

Image Development

For this exercise I chose a photograph from a music magazine. It is of a DJ performing in a converted church – I was draw to this image as I thought that when using a viewfinder it presented as a really separate image. From the DJs face, to the different elements in the church window.

I also thought that the lighting was very interesting – there wasn’t much colour besides in the detail of the church window and the red lights. The contrast of the light and dark on the DJs face was very bold in comparison to the lights and the church window. I think the colour red created such a bold contrast between that and the church environment.

Rather than using photocopies I photographed each image as I have been having trouble with my printer and can not get it fixed due to the lockdown! This way still worked well and allowed me to zoom in and see the different sections of the image regardless.

I ended up choosing the word ‘calm’ and the picture of the woman’s face. Because of how it was cropped you can not see that she is a dj anymore – you can really only see her facial expression. At first I thought that she looked focused or serious in this crop but when I looked longer I noticed that she does look calm – almost serene. I made some sketches based off this image. I decided to change her face from red to blue – as blue is a colour that represents calmness where are red looks more severe.

img_2376
After the artist research I did in part two I have been wanting to use aspects of collage more in my work – I cut out some flowers from fashion magazines to use a long side the final illustration and I also found a large image of a flower to use as the background. I thought flowers would go a long well with the theme of ‘calm’. I chose photographs that had quite muted tones as I thought it would work well with the blue – I didn’t want to use anything to bold.

I drew the image again on an A4 sheet – shading her in blue and black pencil crayons. The drawing is not an exact copy of the original, but the inspiration is based on it. I cut out the illustration and place it on a larger piece of paper to start on the collage element of the piece. I moved the flowers around a few times before I decided where to put them, I hadn’t planned this aspect out too much as I wanted the freedom to experiment. I did know that I wanted to place one of the flowers in her hair. After placing the flowers and sticking them down I scanned in the illustration and put it into procreate ready to add the text.
I tested out a couple of different fonts, mainly cursive ones in blue to keep with the theme. After settling on one I was happy with I wanted to use some of the colours from the initial illustration/collage to tie it all together. I used the same pink as the flowers to highlight the text and draw some further details on her face.

img_2381

I am happy with the overall finished piece – I just hope it meets the brief because it definitely strayed quite far from the original picture that I was working on! I do like the collage element and would like to experiment more with this in the future. I do however think that the text could tie into the over all piece a little better – I did toy around with the idea of using magazine cut outs to spell the words and fit in with the collage aspect but I felt that the text I used better fit the brief.

Reading an Image

dragonmarkoliver
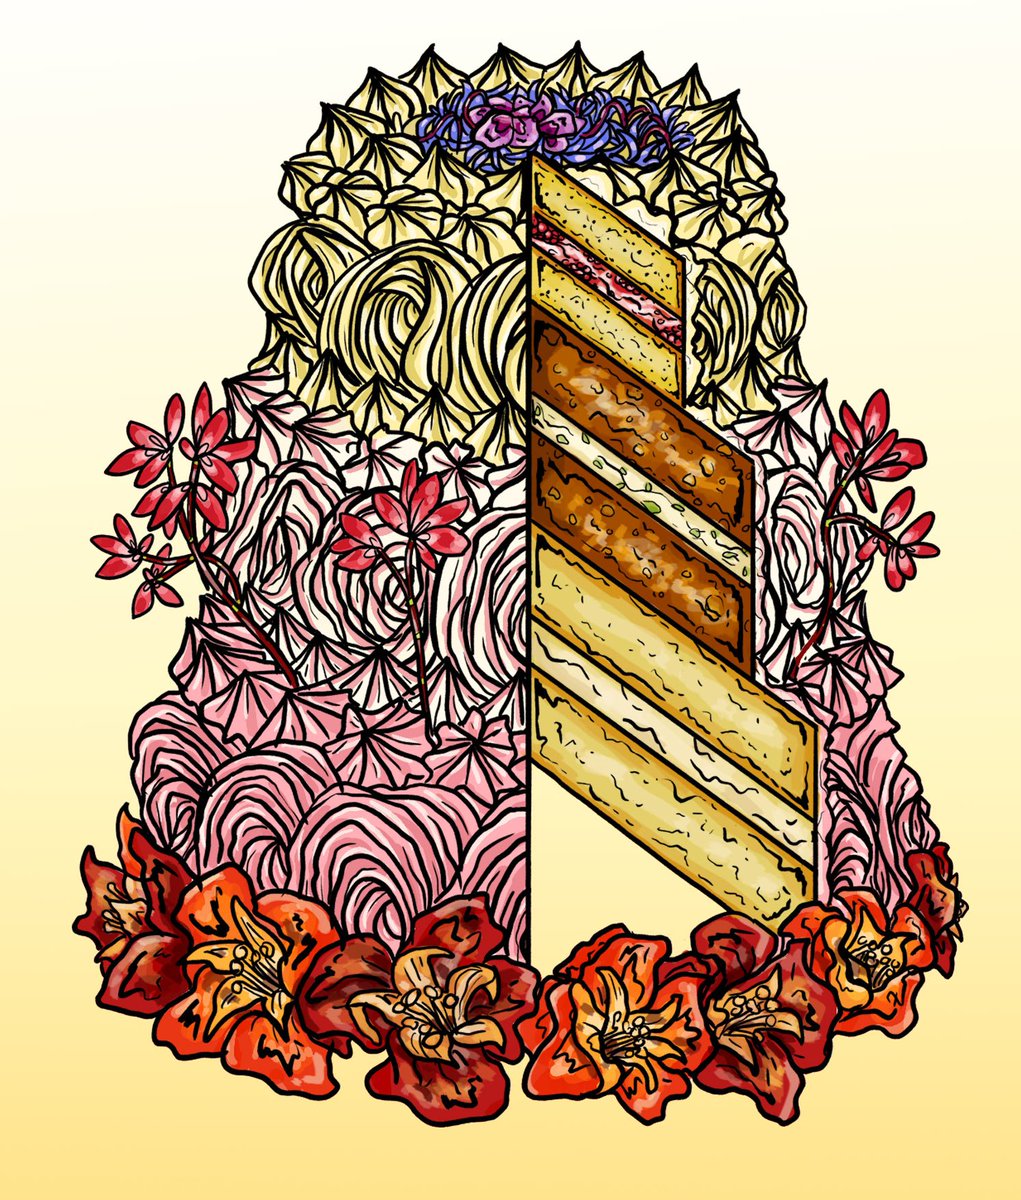
Illustration by Mark Oliver
Image Source – OCA, Illustration 1, Key Steps in Illustration PDF

• What the image is about. What is it saying?

The image shows a sleeping dragon guarding treasure and a throne.
There are two characters to the left of the dragon – they appear to be in a cave (the dragon’s cave).

• Work out the narrative and identify the story.

The story appears to be that the two characters have ventured to get something back from the dragon – there is gold, a crown, a chalice and a throne. He’s also holding/wearing some jewellery .

One of the characters is reluctant and pointing towards the entrance of the cave – gesturing that he wants to leave. The other character however is ready to confront the dragon, she is pointing directly at the dragon which creates even more of a contrast between her and the character that wanted to leave. This definitely gives you an insight into what the characters are like, one seems more timid and worried and the other is headstrong and brave.

There are empty suits of armour and weapons on the floor – what I gathered from this is that knights had previously tried to confront or slay the dragon but were unsuccessful.

• Describe the palette and tonal range which has been used. Note if the colours are
hot or cold, whether the elements are detailed or textural, and where these
approaches are used.


The main colours used within this piece are Green, Blue, Purple, Red, Orange, Yellow although there are some small areas of black and white (but mainly just on the dragons horns). The contrasting areas of light and dark are almost a gradient, blending into each other – you can see more details in the area of light e.g. the pebbles on the ground and the roof of the cave. Both are more defined than the areas of darkness which is a very effective way of indicating shadow rather than just relying on areas of black (I mainly mention this as a note to self – experiment more with colour, especially in shadow).

• Is there any connection between hot colour and the importance of the element in
telling the story?

There are definitely areas of hot and cold. The main area of the bold red/orange is the dragon but there is also another area of hot colour behind the protagonists. I think it is the glow of the torch they are holding but the bold colours and area of high contrast draws the viewers eye directly towards the characters. The characters hair are also the same – warm colours – this frames their faces and immediately draws the eye towards their facial expressions.

This has been a really effective exercise for me because I am really eager to learn more about telling a story through illustration – I want to know more about how to portray more meaning through an illustration. This has been interesting as I have realised that it is more than just the initial drawing that matters – the choice of colours in this piece is fundamental as it really draws your eye to the key elements that build the story. I will refer back to these questions when looking at story book illustrations again as I feel like I have noticed things that I wouldn’t usually!

Illustrating Visual Space

For this exercise I printed of three of the same images in multiple sizes before playing around with them and seeing how positioning and size could effect the image. Some of the placements made it very easy to indicate scale/distance – making it look like the girl was in the foreground, running towards the buildings in the background. I also played around with more unrealistic combinations, the girl being a giant running through the landscape – having each image overlap slightly made it feel like she was in between the objects. I also did another one where she was in the top of the tree top which made for a surprisingly fun image. The collage aspect made the exercise feel quite playful and I was happy to experiment outside of what ‘made sense’.

I think when the figure is smaller than the other elements it feels more realistic and indicates a sense of scale – we can all roughly estimate how big she would in real life so we can figure out how big her surroundings are in relation. I think it is almost subconscious – our brains do it for us when we view the image.

It feels unnatural when the pieces are at an angle although it does make the image seem more energetic. It changes the energy of the piece because it now seems like something more unrealistic – you do wonder why the image looks that way.

I think the images that are more horizontal and vertical in relation the the frame feel more natural as that is how we are used to seeing the world around us. We immediately recognise that kind of environment – even in the ones where the scale doesn’t ‘make sense’ it is still easily readable to the viewer.

I think my favourite composition is probably the one where the girl is bigger than the building and the tree. It is fun and playful – her expression shows that she is laughing whilst she runs. It was also interesting to me to be able to create such a varying range of images using the same three photographs at different scales and different angles!

Artist Research – Jazz Posters

Before starting on the assignment piece I wanted to do some research. I had already decided on the option of designing a poster for a jazz evening, so I started researching jazz artwork and illustrations for jazz posters. I was looking on both google and Pinterest and came across multiple posters for the Montreux International Festival, all of the posters have never elaborate artwork and a lot of them by recognisable artists. When I looked into it further I found out that it is a very prestigious design to be asked to make and a lot of very famous/successful artists and designers have been asked to work on it in the past. The posters are usually in the artists signature style because of that and less of a traditional poster. I found it very interesting to see how multiple artists interpret the same theme in their own styles.

Graphic Design Icon Milton Glaser on His Legendary Posters | AnOther

Milton Glaser – 1976 – Image Source 

This design was by Milton Glaser, he was definitely a fitting choice for a poster for a jazz festival! I love his use of black line and block colour. The figure is a very glamorous woman who is in what was the fashion at the time, you can see the mountains in the background showing the connection to the landscaper – the thing that shows the connection to the music however if the smoke coming from her cigarette. The smoke is curved into a treble clef. I think it’s a very clever image and shows that you don’t have to be so literal when coming up with a design.

Keith Haring | Keith Haring Montreux Jazz (Keith Haring prints ...

Keith Haring – 1983 – Image Source

This poster was designed by Keith Haring – it seems so fitting to have Keith Haring make the poster. His figures are always so energetic and dynamic that it seems perfect for jazz music. Again it’s not a literal interpretation of the theme but it still very effective – you can feel the energy and the movement from just looking at the figure.

Montreux Jazz18 Festival poster by Niki de Saint Phalle on artnet

Niki de Saint Phalle – 1984 – Image Source 

I really like this design by Niki de Saint Phalle, again as all the other designs it is instantly recognisable as her own work and style but it still fits into the theme. The figure looks like she is dancing and there are music notes and instruments all around her. The way she has drawn the text is also very dynamic. Her choice of colour is bright and fun.

Original Festivalposter, XXI Montreux Jazz Festival, F. Boisrond ...

Francois Boisrond – 1987 – Image Source

This is my favourite of the illustrations I have seen for the Montreux Jazz Festival, I’m not sure why I feel so drawn to it but it is just so eye catching. The use of the primary colours is bold against the black and white of the rest of the image. The instruments seem like the loudest thing on the illustration because they are the only thing in block colour. The directional lines are very effective at visualising sound. It’s very hard to illustrate something that we can not physically see, but doing this research has helped me see that it is possible in many different ways!

I think that for my poster design I will be aiming for a more literal way of depicting Jazz, but I am still glad I looked into these, it has shown me that things do not have to be so literal all the time, and that there are many ways of illustrating sound and movement.

Pinterest Board

pincode_583286657928239072

My Pinterest board for this Assignment is linked above, it is where I originally came across the Montreux festival. I have really enjoyed this research and found so many brilliant pieces. I love the use of bold colours that a lot of them use, a lot of the colours are in blocks with out outlines.

1979 New Orleans Jazz Festival Poster A3/A2/A1 Print
Image Source

I wanted to talk about these pieces because they all show examples of this block effect. They are all minimal but are still very effective. Both of these pieces use yellow to highlight the instrument, it is clever because it fits in with the image but still allows the instrument to be the main focus of the image.

New Orleans Jazz Festival Poster - Studio Gary C
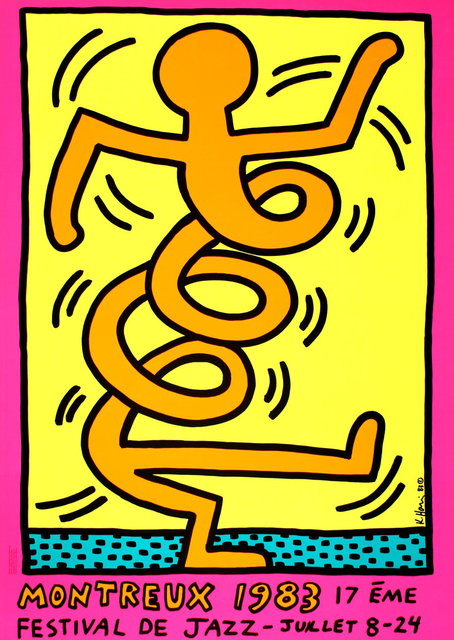
Jazz Poster by Cieradkowski – image source 

This one has the highlights in the piano players shirt and keys. The singers dress and hair flower are the only two colours besides the background. I am very inspired by this minimal style and hope to explore it within my own design.

La Chanteuse De Jazz New York Poster by Gary Perron
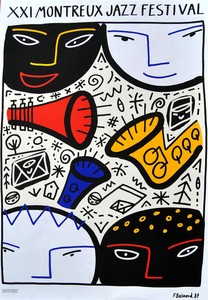
La Chanteuse De Jazz New York by Gary Perron – Image Source

I wasn’t sure where to start before starting this research and I still have a long way to go in terms of developing my ideas however now I have some ideas of what a poster for a jazz evening should look like. I am definitely inspired by the more traditional style posters – I think they look very classy and as soon as you see them you could remove the text and still instantly know they are about jazz. Another thing I have taken from this research is looking at the use of a colour palette and how that effects the image – I want to create a limited palette to use within my poster so my work has a similar effect.

There is a lot of food for thought here, and this research has been very helpful.

Response to Tutor Feedback

Overall Comments
Part two of the course has focused on developing your ideas through a creative
process, from a brief to your finished illustrations.
Overall your response to part two has been very good with excellent sketchbook
and support work showing clear creativity and a willingness to explore.
Your drawings respond well to a lack of restriction and without the need to be
perfect. If this is a new development in the way you work then keep it up as it has a
lot of benefits and allows you to get the most from your work. Think about ways
you can also maintain this expressive line in some of the final artworks to keep
movement and interest in the work.

Thank you, I feel that now as I have been working through part 3 I have realised that I actually want to be a lot more expressive in my work. I have definitely been losing some of that movement when it comes to the finished piece – I think I need to start working in more traditional media to achieve the energy I am hoping for.

You have a great working methodology and use this to effectively explore each
subject thoroughly. You readily reflect on your work and research, comments are
honest and insightful. You use this support work to develop effective solutions to
the briefs.
Keep up the experimentation with alternative materials and techniques. This is
really starting to benefit the work and provide you with more insight into the
techniques that are available for you to use.

Thank you, I think one of my biggest flaws is confidence, if I could be more confident in myself I could definitely achieve more in terms of experimentation.

Project: The Brief
Your first exercise focused on writing a brief for a chosen illustration.
You have a god understanding of what the client would request for this
commission. Your research is also good and very topical. What about reflecting on
this task, was it helpful in any way?

Thank you – I will revisit this exercise and add my reflections.
Project: Generating ideas
Generating ideas is a vital skill for illustrators to compliment overtly visual skills.
You were asked to generated ideas through a spider diagram for a number of
words, and reflect on your strategies.

Excellent and very thorough spider diagrams drawing on feedback from others as
well to extend the possibilities of each word. You’ve utilised a useful colour code.
Reflecting on these you make relevant comments and it’s good to know that you
will be utilising them from now on.

Thank you – I have found the mind maps to be very helpful in kick starting my ideas!
Project: Words to pictures
Working visually, you were asked to generating ideas through drawings and a
mood board.
Although you describe the drawings as imperfect I think they work really well and
instantly convey the dynamics you mention. They feel energetic and spontaneous
and it’s positive to read that this has been helpful for you. The use of the washes
works well to create tone and depth.

Thank you – I did enjoy this exercise.

Mood Board
It’s positive you’ve taken time to consider the composition of the mood board. I
also think the abstracts taken from it work equally well – this is a technique that
can be useful. You’ve managed to use both 2D and 3D materials to bring in added
texture and pattern.

Again – I found the mind maps very helpful to start developing ideas, it has definitley been helpful moving forward knowing I always have that ‘starting point’.

Project: Using reference
Illustrators need to have a mine of visual resources that they can refer to when
creating images. You were asked to collect as much reference material as you could
find for the 1950s period from a range of categories, from which you then made an
illustration to give a young person of today an idea of the era.
You have an extensive collection of research. At times it would be great to see you
delve into this a bit more to promote some discussion of specific designers and
perhaps the political and cultural climate and how this affected things. You do
touch on this though.
It’s great to see the progression of images as you start to figure out your scene and
the key elements to portray the message. The final image is not dissimilar to your
drawing style (for example, the fashion illustrations) and although I agree with
some of your critique, the images are more staid but you have managed to capture
a lot of detail and enough narrative in this image with good references. You’ve
managed to make effective use of the techniques developed so far to help
generate ideas for this.

Thank you, I agree I could have definitely looked more into the political climate and more of designers of era. I do lightly touch on it but if I explained more I think it would better explain my finished illustration and why the woman is cleaning and the man is sat in the chair.

Project: Mark making
Through the exploring drawing and painting exercise you were encouraged to
explore the creative possibilities of different papers, drawing implements and
investigate mixed media, as well as undertaking objective and subjective drawings

Mixed Media Drawings:
You demonstrate a willingness to explore different materials and not just those of
preference. This is demonstrated through the detail and line achieved in the variety
of drawings, some fine, some rough. There is good reflection of the materials tried
and tested.

Thank you – I do need to allow myself more room to experiment.

Objective Drawing:
Although a competent drawing I agree with your critique and that more tonal
contrast would help to create depth and elevate the piece. However you have
worked hard to get the proportions and shape right. It’s positive to see you extend
this task by using the photocopies to add additional detail. Compare the final two,
which works best and why?

I will go back and add comparisons to the post!

Subjective Drawing:
This is a really successful image and I think your experimentation really allows you
to get the most out of the task itself and to extend your visual vocabulary.

I really enjoyed this exercise – I hope to work more will collage as I continue, I really enjoyed the experimenting and photographic quality of working with the scanner/copier.

Project: Black and white
You were asked follow a process to produce a simplified graphic image in black
and white.
This is a very successful image, it’s clear you’ve given a lot of thought to this before
progressing. You might also like Frank Miller’s drawings for Sin City. Your images
work well with the strong contrasts and although it does move away from the brief
slightly I like the fact you use the experiment to your advantage to create added
depth and interest. You have good research supporting this task and you
comment on this readily.

Thank you – I was worried about this straying too far from the brief! I do like the work of Frank Miller – I will include him in some future artist research!
Project: Choosing content
Working with an extract of text you were asked to define, research and develop
ideas to visualise the main character with in the setting suggested.
Although you are critical this is a great attempt and you also demonstrate that you
can move between different media easily wit good effect. It was great to look
through the sketchbook pages and these show some great working drawings
alongside annotations and research images. The final image is atmospheric and
although you think it unrefined these lines and textures really help add depth to
the image and convey some of the ‘hardened’ character you had initially intended.
Perhaps the window could’ve been used to greater effect, for example having the
shadow from the window bars falling onto the character? Perhaps even covering
his eyes to counteract their scale?
After collecting examples of visual metaphors you were asked to create a drawn
visual list of object and subjects that could symbolise a number of words. Once
completed it was suggested that you let someone else critique your work – did
your drawings communicate as you intended?

Yes I agree I could have definitely utilised the window for an even more dramatic image – covering the eyes is a good idea. Thinking about it now I could have added another collage layer underneath the window but above his face creating the lines of shadow. I did ask family members about the drawing – I will add this to the original post as well to ensure I meet the brief.

Feedback on assignment
Creative and analytical thinking, Visual and Technical Skills
The assignment asked you to respond to a point of sale display brief in which you
were asked to illustrate fruit or vegetables associated with summer and autumn.
You have wide ranging research. Can you cite some specific examples to discuss?
How can they inform your own work? There is very clear progression as you initiate
ideas and sketches from life. The spontaneity of these is great. The continual
development of these drawings over and over really helps you to hit on the right
image and to refine this further. For example, developing the ‘heart’ in the onion
layers.

Thank you, I will be sure to be more thorough when discussing examples of work in the future.

Although you have opted to take these into a digital format you treat the images
with care and attention in order to achieve the right effect and remain fairly true to
the original drawing. Again, it’s good to see the development of this work from
initial concept sketch through to the more polished final design. You reflect on this
work constantly in an effort to edit and refine it.

Thank you – sometimes I worry I talk about my work/process too much but I find it the only way I can get my ideas across!

Autumn Image:
You’re clear from the outset abut the typeface you want to include and why. The
addition of the handwritten text works well to provide clear links to your primary
research and to aid the overall aesthetic and concept you were after. The black
background works well and allows the main image to stand out very effectively.
Both designs appear to work well with the plain background and the additional
layered image. My one comment would be whether or not the ‘heart’ shape stands
out enough in the centre of the onion – should it be more apparent? I do wonder if
it is almost too subtle so perhaps alter this to see how it works and compare and
contrast the results.

Yes I agree, when I look back now I do think it is quite subtle – it could definitely be bolder especially when the word ‘heart-y’ is used. It would help tie the image together better.

Summer Image:
Again, it’s good to see development from start to finish. You have small thumbnail
sketches of the layouts and are true to these in developing the final designs. The
pepper is certainly bolder than the onion as the overall colours are less texture and tonal. Consider angling the pepper image (so it’s not straight) to help with the
overall feel (less formal) and to allow this composition to remain consistent with
the first POS. The type follows suit and works very effectively. For this design the
background layer is less convincing so consider experimenting with these in each
design to see if they would work better scaled up and made more abstract so they
detract less form the main image. You mention in the reflection that you weren’t as
happy with this image. I was wondering if you tried it on a different colour
background? Black works well for autumn but perhaps a more complimentary
colour for the pepper would allow it to stand out more? Something to experiment
with? Although it would then deviate slightly from your research images.
Overall, two very successful images that show you utilise a rigorous methodology
to generate effective ideas, images and final illustrations. You are attentive to
research and maintaining clear links to this alongside the audience. You have a
good eye for type and have used this very effectively to compliment the images. I
agree that the first illustration for autumn is the most successful as it incorporates
and additional play on the words so again, finding an alternative for the pepper
would help to elevate this final image further.

I agree with experimenting more with the background to create a better fitting image for ‘Summer’ – my orginal intention was to have the autumn image and the summer image be quite similar as they would be for the same store but now I think back on it the Summer POS would be completely different to the Autumn POS! 

Sketchbooks
Research and idea development, Context
There is excellent use of the sketchbook following on from the experience of the
first few exercises to build ideas using mind maps, mood boards and drawing. The
support work provides a good grounding for the ideas before you progress on
screen.
You are also willing to experiment with alternative materials and techniques to
help generate final artwork so this level of experimentation is great – keep it up.

Thank you – I have really been enjoying working in my sketchbook.

Learning Logs or Blogs / Critical essays
Research and idea development, Context
You have effective artist research looking at some of the suggestions and those of
your own. The analysis of these works allows you to reconsider your own
approaches and methods. For some of the exercises and for the assignment you
have a wide range of research compiled on Pinterest, although you are attentive to
this, try to spend time citing some specific examples to discuss and why you have
selected them. How can they inform your own work?
You readily critique your own work with regard to the brief and your own
intentions. This helps it undergo a process of editing and refinement in the latter
stages.
Suggested viewing/reading
Orly Orbach
Zoe TaylorBarbara Firth (use of original line apparent in final artwork)
Helen Oxenbury (use of original line apparent in final artwork)
Jonny Hannah

I will definitely cite more examples and inspirations and say why I found them helpful/what I learnt from them.

Pointers for the next assignment
The next assignment explores the process of transforming your ideas into a form
that best communicates them. This is an opportunity to …
• Make sure you explore alternative ideas before settling on one to develop.
• Good use of alternative materials and techniques to generate effective
images. Keep up this level of exploration!
• Continue to use the exercises to lead your working process – mind maps,
mood boards and sketches.
• For some of the Pinterest compilations try to cite specific examples to
discuss.
• Continue to explore ways to retain the spontaneity of line through to the
original artwork (see suggestions). And think abut ways to combine
traditional and digital.

Thank you for the feedback, I will do my best to use all of your advice as I go on – I had already worked through a lot of part 3 before receiving the feedback but I will use the advice moving forward.  

Assignment Two – Point Of Sale Display

I started this project by doing some artist research (see previous post) and by creating a pinterest board. This board ended up absolutely packed with all sorts of things – food illustrations, advertisements and supermarket POS. I almost got lost in the research for this exercise – I really enjoyed it. I have never spent any time looking into food illustration before but I found so many examples that I really loved.


pincode_583286657928192723

I made two long lists of seasonal vegetables for the summer and the autumn . I marked the ones that I thought would make for an interesting image. There were so many to choose from but I couldn’t possibly draw them all.

IMG_20200301_235816_1.jpg

I made sketches of the ones I had marked in my sketchbook with some pencil, I sketched loosely and quickly. I am happy with these drawings and I enjoyed making them. I have never really done any food illustration before and was surprised how much I liked it.

I settled on bell peppers (summer) and onions (autumn) for the vegetables I would draw for my final piece. It was hard to narrow it down to be honest but they were the sketches I thought were the most successful – I would love to revisit that pumpkin though!

I made some more sketches over the next couple of pages and wrote down all the words I could think of that relate to that vegetable. After the mind map exercises during part 2 I have found how helpful using singular words is to prompt ideas for drawings. I had words like sweet, crunchy and colourful for pepper and staple, hearty and powerful for onion. I liked staple and hearty because they did sound very autumnal.

I took some photographs of bell peppers and onions and put them in my sketchbook as reference images. I also took some photographs of the POS in my local supermarket to see what they had. It was all made to look like an old traditional hand painted chalk sign. I think it fits the comforting theme we all seek when it comes to our food, we seek more than just sustenance from our food these days. That helped me settle on using ‘heart’ or ‘hearty’ in my onion piece. I tried to come up with some lines that I could imagine being used in shop POS. My favourite one for pepper was ‘Crunch Time’. I knew I wanted to use ‘hearty’ for onion. I ended up choosing ‘putting the heart in hearty’ which eventually changed to ‘Let’s Put the Heart back in Hearty’.

I decided to draw both sliced in half as I thought it made for a more interesting image. I kept the heart in the onion that I had been playing with in my sketch book to play into hearty. I wish I had thought of something for the pepper too! ‘Crunch time’ would have suited a bite/crunch taken out of the pepper. I only noticed this when looking back over the assignment pieces and it would definitely be something I would do if I were to redo this piece. The final thumbnail I had decided on (in one of the previous photographs) is one that has the illustration of the vegetable with a larger faded version of the same illustration in the background. I chose a black background which will have white text to mimic that chalk board effect.

I got started on the onion, I made an initial sketch and then lined it in purple. I then adjusted some of the lines at the top to give the onion a more defined shape. I usually line and then shade on a layer underneath the line art but I want to stop relying on outlines so much. I worked on top for this drawing, I wanted to take how I would work on a traditional piece and work in the same way digitally.

I also chose brushes that have the effect of traditional media. I feel like this way looks more suitable for the chalkboard effect but I also think that it looks more appealing. I also think that it is more fitting for an upmarket shop – as they would probably not display cartoony work.  I added lines to the skin to try and create shape and just continued building upon the image until I was happy with it.

After the initial drawing process I started on the background and text. I chose the font futura as it feels nice and clean but still professional and not too modern for a supermarket. I also decided to hand write ‘hearty’ to really add that chalkboard effect – the photo above that just says ‘Onion’ was from when I was testing diferent brushes to see which one I thought looked best. I duplicated the illustration layer and made it larger before lowering the opacity. I also added the text to the bottom for the store name – I made a mock name up just based on the name of two upmarket supermarkets. It’s not perfect but much better than ‘Shop Name Here’!

I am definitely happy with how this turned out, and I also like the background too. I tried to be more considerate when it came to the background in this assignment after tutor comments on assignment 2.

I started on the illustration for the pepper next, I worked in the same way as before layering on top rather than underneath. I ended up reshaping the bottom of the pepper as I realised it was too thick.

I erased the background layers below the pepper to help it stand out. My biggest problem with this piece I should have added more white to the pepper to add more contrast. The definition around the seeds could definitely have been stronger too. As you can see I also rewrote ‘Crunch Time’ multiple times to better fit the space.

img_2308img_2307

Overall I am happy with these illustrations, I am certainly happier with the onion one than the pepper. I think it is overall a more successful image – I think the white of the onion creates an effective contrast against the background – I think the pepper looks slightly more lost in the background. The onion in the background also frames the image better than the pepper. In the pepper image there is a lot of negative space on the left hand side. I am happy however that I broke away from using thick black outlines and explored different techniques – I think it results in a far more professional looking image. I feel like I have gone through such a learning curve in Part 2 of illustration one. I am really finding new ways to work and allowing myself to explore which in turn is building confidence and allowing me to get out of my comfort zone. I didn’t know what to expect of this assignment piece going into it but I did enjoy exploring a new sign of illustration I have never delved into before and I do hope to revisit food illustration later down the line!

Food Illustration – Artist Research

Before starting on my assignment pieces I decided to do some research on food illustrations/illustrators to get a better understanding and to see some different examples.

Ohn Mar Win

Image result for ohn mar win

Illustration by Ohn Mar Win – Image Source

I found the work of Ohn Mar Win whilst looking online for examples of food illustrators. Ohn Mar Win uses watercolour and photoshop to create her illustrations. I really like the colours she uses – everything is vibrant and eye catching without being too bright – the food she draws all looks tasty and inviting.

TOAST Superfood TALL-02.jpg

Illustration by Ohn Mar Win – Image Source

I particularly like the lack of outlines in her work – the textures and colours she uses describes the shapes so she doesn’t have to rely on any outlining to define her work. I have struggled with relying on outlines during my drawing on journey and would like to push myself to break that habit.

Lisa Maltby


Virgin Atlantic cocktail illustration
Lisa Maltby for Virgin Atlantic – Image Source

Lisa Maltby is an illustrator and lettering artist from the UK.
Lisa Maltby’s food and drink illustrations look very inviting and the cocktails certainly look refreshing. I think the use of bold natural colours in both the work of Maltby and Ohn Mar Win is what keeps the illustrations eye catching and bright but also able to look appealing. Any unnatural colours wouldn’t be as appealing.
I think Maltby’s illustrations are very chic – her use of line and colour remind me of fashion illustrations, I think this is because of her bold line work and expressive use of colour. The black used in the lines creates a high contrast with the highlights on the glass which show the reflective surface and creates a more dimension image.


Tom Hovey
Image result for tom hovey

Tom Hovey for The Great British Bake Off – Image Source

When looking at food illustrators I also came across the work of Tom Hovey – I found his style immediately recognisable as he was been the illustrator for The Great British Bake Off for the last ten years. This surely must make him one of the most famous food illustrators in the country! The reason I wanted to mention Hovey’s work is because of the level of detail he manages to portray in his pieces. The illustration above shows all different piping designs, the inside of the cake including the different fillings and three different types of flower. I do think it is impressive that he can get across such a level of detail and still have an image that is easily readible and not over worked. I particularly like his use of highlight – it balances out the black line work well and helps show real dimension. It is almost easy to forget that we are looking at a drawing of a cake – it looks so three dimensional with the slice taken out of it!

I’m glad that I took this time to look at the work of some food illustrators as it was definitely an area I was unfamiliar with. It is so much more than just drawings of food – each image is carefully considered in order to make the illustrations appealing to the viewer. I think when food illustration is done well our brains react to it as we would food – seeing something and actually wanting to eat it! This is very important to achieve because for the most part food illustration is used in work for restaurants, supermarkets, magazines etc. I am looking forward to getting stuck in to assignment two now!

Visual Metaphors

I collected examples of visual metaphors on the pinked pinterest board below. I also found some great examples of visual metaphors here – Visual Metaphor Gallery – Research Gate  .

pincode_583286657928196648

For this exercise I chose ‘Dreams of Romance’ – I started by making a visual mood board of illustrations and words I relate to romance. I decided to choose this topic as I thought it would be a challenge. I think that some of the other prompts would have been easier to communicate but I wanted to push myself out of my comfort zone.

I did some initial sketches in my sketchbook and then made a few quick illustrations on procreate. I asked my family what they thought when trying to come up with images for romance. They also suggested flowers and a cupid.

img_2203

After coming up with these ideas I started mocking up some thumbnails.

I wanted there to be a literal depiction of “Dreams of Romance” as I wanted the metaphor to be clear to the viewer. My initial ideas were one of a woman in bed literally ‘dreaming’ or a woman day dreaming. I thought that day dreaming was quite hard to get across – it read more as ‘thoughts’ or ‘thinking’ than dreaming.

For the actual dream I had one idea of a man (potential suitor) surrounded by all these stereotypical gifts of romance – the other idea was an engagement happening during sunset on a beach. I thought this was the most ‘obvious’ to the viewer.

img_2167

After deciding on the dream I lined the whole drawing – I have the dream scene on a different layer so I can shade it separately – that is the reason it doesn’t appear in all of these screen caps, because I only had one line art layer visible at first. When lining I changed the girls mouth so that she was now smiling. I wanted it to be clear that it was a happy dream. It might be confusing to look at if she looks kind of sad and dreaming of an engagement.

I chose colours that would be considered quite romantic and feminine. Pastels and pinks. I thought the blue was a nice contrast with the pink but the pastel shade kept it quite delicate. I used these brushes as they resemble traditional media which creates a far more dreamy and romantic image. I wish I had thought of this when I did the initial line work.

img_2202

I showed this drawing to my husband when I had finished it and asked him what he thought. He originally said dreams of engagement, or dreams of love. I will take that for what it is. The final illustration could have definitley been stronger. I am happy with the girl in the bed, I think the image looks nice and clean. Technically I’m not too pleased with the dream scene – however that being said I do think that the illustration gets across what I was trying to portray. I need to let go of all the finished pieces for these exercises having to be absolutely perfect when sometimes they are actually more about learning about concept and how to communicate a message or idea.

Choosing Content

I started another pinterest board for this project as I have found it helpful in finding useful reference images. I saved photographs of men that remind me of the man in the excerpt or how I imagine his clothes to be. I also saved photographs of 1940’s London.

pincode_583286657928197475

This exercise begins with an excerpt from The Daffodil Affair by Michael Innes. I read it over a few times before I started answering the following questions. I find that when I read something the first time I get an idea but if I read it again I get more of an understanding.

• If this were to be made into a film what would the main character be like?
I think he would be in his late 40’s or 50’s, it says he has been controlling the files for 15 years – therefore he has at least 15 years on the job and probably had prior experience before being put in a position of such responsibility. I think he would be quite a hard faced man after so many years in a hard job – especially wear it says that anger had become his innermost principle. He is clearly a policeman as it says he is in New Scotland Yard which is the name of the police headquarters in London. 

• What clothes would the character be wearing?
I am assuming that it is the 1940s as it says it is war time London so I imagine the man to be wearing a suit. I initially thought of the detective wearing a hat and long coat however since he is inside I thought he wouldn’t be wearing that – the 1940’s were still a time of people keeping to their manners and wearing hats indoors was considered disrespectful. I think he would be wearing a shirt and tie and the typical men’s slacks from the time and a matching suit jacket.

• What furniture is in the main area in which the action takes place?
There is definitely a desk – a large desk with papers on top. There is also a chair at the desk where the man was sat before he moved. I wonder if there are also filing cabinets of some sort – since he manages files, where would they be stored. There would probably also be a clock.

I printed some images in my sketchbook as well as the brief and excerpt so I could underline any parts I thought were important. I made notes on the next page as well as some initial sketches. I found this daunting as I am not used to drawing men, especially hard faced detectives! I made some sketches in my book of multiple different men as well as some thumbnails for ideas as to how would I portray this man and the overall mood of the scene.

I also used Historic UK for more references on this time period – link here.

pincode_583286657928197805

When choosing a word to focus on I ended up with the word ‘harsh’. I wrote a few down in my sketchbook and I did initially like the word ‘bleak’ but I don’t feel it expresses how the man had become hardened by the world around him. Harsh seemed to fit better, the world around the man was harsh, his job was harsh, it was war time, and he himself had become a harsh man.

I liked this sketch in my book and decided to make the image based off this one. I put this sketch into procreate and played with it until I had drawn an image I was happy with. I printed just a line sketch and started sketching on top of that to indicate where the lighting would be. I wanted to indicate that light/shadow contrast suggested in the text. I decided to do this by having one side of his face lighter than the other/with less shadow. I wanted to keep the background simple as I had decided to do a head and shoulders portrait and I wouldn’t have a lot of space. The brief also asked for a simple portrait so I wanted to be mindful of my time management as this is definitely an area I need to work on.

I also wanted to play with the idea of collage again, I decided to draw the man and then layer a window on top of his face. I transferred the line drawing onto watercolour paper using a light box and started building up shadow – I kept that initial experiment close by so I could refer back to the areas of light and dark I had mapped out. I worked in black and grey because I wanted it to be reminiscent of the film noir stills I had looked at on my mood boards.

I used watercolour, pencils and pen to build the image up. I kept the pen and pencil lines ‘harsh’ too – I thought that it would help add to the overall mood of the image – as I worked though I think I made his eyes too large to be harsh, big eyes are usually friendly and even though he had this hardened expression on his face it just didn’t fit.

To create the background and window in the foreground I put the image into procreate and I did up the contrast a little as I don’t think it was high enough – the image seemed quite grey. I created the background by adding a white and black gradient and shading it further with a halftone brush. This definitely helped give it a darker moodier feel and helped give it that film noir look.

img_2252

Next I created the window, I kept it looking paper-y so it would match the scan of the man himself, I also added some paper style shading.

img_2253

The drawing has a lot of issues in the end, I do wish his eyes were smaller. I feel that it looks unrefined, I think that the fine-liner I used added to this. I think that because a lot of the pieces I have made are digital that I missed the ease of making it looked refined in the same amount of time. It would have taken me so long to achieve that same level using watercolour – I need to stop being so hard on myself and accept that a lot of these exercises are more about exploring and learning how to build and develop ideas. With all that being said I do think that it meets the brief as it illustrates my research and the excerpt. I do feel like it meets my theme too – Harsh. He certainly looks like a man hardened by the world around him.